This world we live in is really amazing. The little freak even watches for traffic. Sheesh I can barely get the little people that live in my house to do that.
Monkey Riding Mini Bike - Watch more free videos
Mar 28, 2008
Who doesn't love Star Wars?
Man, if I had access to a video camera when I was young and spent time having fun...
Mar 25, 2008
Mar 24, 2008
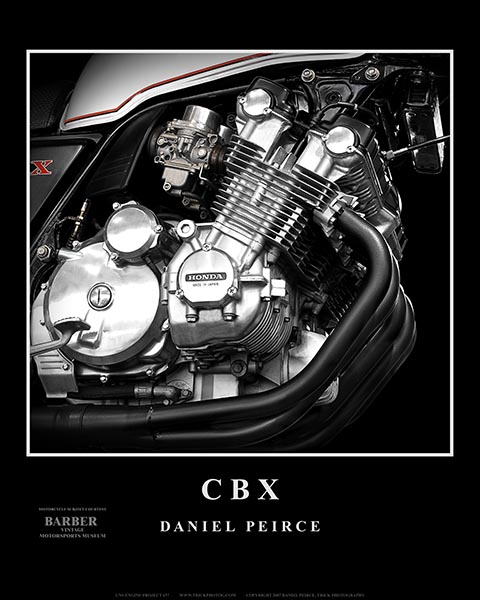
Warming up the cafe rocket of old
1982 CB650 with 27093 on the odometer. It started bone stock when I got it. I have owned it for the last 3 years and have done all the right things to it in that time. Now we want to put the money into some other fun things like my CBX or a miata or my driftboat project, and well ... It's a great bike and I keep checking powerball numbers, but I have to sell it reluctantly. I am also willing to consider a trade for cash and an Apple laptop preferrably with illuminated keyboard and running tiger so anything newish and "silver" *(Powerbook or MacBook Pro)
* New Dunstall Megaphones on 4 into 2 exhaust headers. Chrome is in excellent shape.
* Powder Coated Engine covers, carb covers, oil filter cover and forks
* Stage 3 Jet Kit from Dyno-jet (still have a coupon for a free dyno run, chose not to do it since it is hard on an engine)
* New rear shocks
* Clubman drop bars put on -original controls still used.
* Raask rear sets imported by Omar's from the EU somewhere.
* bearings in the hubs replaced
* Carburetors professionally rebuilt
* new fork gaitors (gators?)
* cool chain-link steering stop
* New taillight assembly, front turn signals
* Rebuilt front forks- new oil, etc.
* New wiring harness installed.
* Hard wired battery tender although the new battery lasts through days of use without it
* Engine tuned and tinkered and adjusted to perfection in various places- cam, valves, etc. The thing is just plain sweet now. Ready to go on a moments notice.
* The tank is from a GS550 Suzuki -modified to fit then coated the interior with hardcore sealer from Caswell Industries -not the cheap crap.
* Tires were new about 2 months ago so they have less than 300 miles. Bridgestone Spitfires installed by Vicious Cycle -so I didnt bugger up the great chrome on the rims.
UPDATE: There is no evidence of the chicken strip. They are evenly worn from side to side. The ergos of this bike are actually perfect for a rider at 5'9" and 190 lbs (give or take a few inches and pounds).
Here is a video link of the bike on a COLD START... listen all the way to the end when I really let it rumble
Mar 21, 2008
FinChasers Warranty blurb
ABOUT OUR WARRANTY
FinChasers Boats are warranted for life under commercial or private use, against bottom punctures and leaks while property of the original buyer. This guarantee does not cover normal wear and tear, cosmetic damage (i.e. gel coat, interior finishes, etc.) or damage caused by misuse, neglect, or accident. It does not cover failure of materials or parts manufactured by others, but does cover any workmanship by FinChasers, LLC (i.e. hardware installation). Alterations to a FinChasers boat by the original owner voids this warranty unless authorized by FinChasers, LLC. FinChasers, LLC's sole liability is the timely repair or replacement of the boat by FinChasers, LLC at the point of manufacture or by an authorized FinChasers Boats repair center. Any remedy is at FinChasers, LLC's sole discretion. Transportation charges will be at the owner's expense. Proof of purchase is required to initiate any warranty claim.
Mar 20, 2008
Two wheels back in my garage


I brought home the bike for some cleaning and polishing, removing the centerstand, etc. Runs great, sounds perfect. Now I just need to do something about my seat and rear fender.

Mar 17, 2008
The Final Stages of Clear Coat

I have about 6 small rattle cans of clear on the motorcycle tank now. I put them on pretty much continously for the first two cans. Then I let them dry and because I let them dry I had to sand the clear and rough them up to really bond to the next layers a few days later. I hear it is better to just continue clear coat application very lightly every 5 minutes or so allowing all of the coatings to dry together to make on thick luscious skin.
Oh well, I used 3M rubbing compound about 20 hours after the final sprayings of clear.
 Shown above is the side cover with the proper amount of rubbing compound lightly hazed on the left. After a gentle but firm circular wiping with a clean cloth diaper it turns into the side cover that is sparkling on the right.
The picture here below shows untouched clear coat on the left, polished clear in the center and hazed rubbing compound on the right side. I don't know why I took the picture other than i am trying to be as thorough as possible.

Imagine that the light coating of rubbing compound being applied is actually very fine sand paper and not a liquid (...it actually is a liquid). It doesn't take much at all. As you gently "wipe" in circular swirls continue moving to a new 2" sq area of the cloth that is clean, otherwise you are rubbing small particles of clear coat back into your piece.

It is now ready for high RPM buffing with an even finer polish "step 2" in the 3M system at your local automotive source.

It's all hingeing
Today I send the second and final payment for driftboat emblems. In 3 weeks they should be at my doorstep. A month later there will be at least one order for a driftboat and I am not ready.
* I need to secure a location for light industrial manufacturing... fiberglass resin can be smelt for a quarter mile around. I am going to go visit the Aurora Airport and see what a hangar costs in this day and age. Plus Aurora, Oregon has a nice ring to it when people start to imagine where their boat was given birth.
* I need to figure out the waterproof hatch system for each side compartment in the boat. I was considering ways of incorporating an OEM solution from the Pelican Case Co. But I also found Arrowhead Inc and they have a cool hinge that may work in conjunction with their fiberglass door. I would want to make the door/hatch a custom size that is a bit bigger and followed the contours of the curved outside edge of the side compartments.
* I found Arrowhead as I was trying to take fiberglass boat manufacturing to the next level beyond "hand-laid" fiberglass layers and into a vaccuum assisted Resin Transfer Molding process. Here is the company that makes RTM molds for Lockheed, Boeing, etc.
By doing an RTM mold I wouldn't feel the need to hire someone right out of the gates to do the glass work. I could do it myself and probably make a boat every other day. It would be cool if the demand was that high.
Mar 14, 2008
AfterMarket Parts for CB650

I think I am going with the Vesrah clutch plates, springs, etc from Sudco when I have the money. I am posting some info here since it was really hard to find the parts.
I can't believe I finally found the velocity stacks I need as well in the Sudco online PDF Catalog. Of course I will probably go red. I wonder how much they are?

Reaching the Rear Sets

I wonder if anyone has ever duct-taped wooden blocks to foot controls?
This SV is done right and the best part about it... a chick owns this rig. She is pretty Bad-A from what I hear from my buddy who has been dating her. She plays Volleyball here in P-town for her University.
There is a set of those dual headlights on C-list for 200 bucks (they retail at 500!) There is part of me that wants them on my old Honda, but I am not sure about what rickman or dunstall fairing I might want to put on my cafe rig so I am holding off. Plus 200 bucks just isn't in the family budget right now. I need to upgrade the clutch and brakes first.
Mar 10, 2008
The Italian Spiderman- Trailer
I don't know what's best about this... the snake and cigarette scene, the sandwich, "Poncha, Poncha, Poncha!"
It's probably just the super-bad ducati bikes of old.
Anyway, It's a must-see. Booking my flight for Milan now.
It's probably just the super-bad ducati bikes of old.
Anyway, It's a must-see. Booking my flight for Milan now.
Mar 8, 2008

It doesn't say how long I need to wait before putting gas in. I'll just be careful. Rearsets are on. The fork seala are rebuilt. Carbs are cleaned. Oil - new, filter - new. Oh crap! I have to get the petcock fitting rethreaded. CRIPES! And I am helping my buddy build his in-laws vineyard trellises (trellisi? trelli.. i?)

How long for the tank sealer?

I'm getting kinda anxious to put gas in the tank. I know, I know, I could mess up everything I've done.
Well the tank sealer needs to cure. I got it from an industrial chemical and polishing company back east. Their site will tell me the cure time and that will be the deciding factor.
... sweet ...
"Place the tank in a warm 70-90 f place and allow to cure overnight. In the case of alcohol fuels, allow 3-5 days at room temperature, or 24 hours at 120 deg f."
... I'm not running alcohol fuel.
Tomorrow we ride.
(tomorrow when I think I am done clearcoating I will go figure out how long I need to let these clears cure- probably says on the can.)
Mar 7, 2008
Feedback for the rookie painter?

Shoot I just finished one coat of clear and then came to the computer to see if I should wipe it down between clear coats. After searching for my answer two different ways my own blog entry came up as the number one hit both times. Like I said, there aren't any "clear" instructions on the web.
Maybe it's some trade secret to keep people from doing it themselves. Now I just hope my blog isn't giving mis-information.
Feel free to comment... anyone... buehler?
"Niiiiine times."
Man, that was funny.
Man, I have sniffed too many fumes.
Mar 6, 2008
Motorcycle Tank Repaint - Bondo, Primer, Decals, Pinstriping, Paint, Clear Coat
Part 1 The Prep: Bondo and Prime for Paint
I really couldn't find a concise, informative site that walked a guy through all the steps of repairing a motorcycle tank all the way from bondo to clear coat. So here is a process that seems to have worked for me. It has steps that were gleaned from multiple sites as well as a few friends and some buddies at Baxter Auto parts where I bought my House of Kolor rattle cans.
That's right, Rattle CANS! Sure, the catalyzed 2-part automotive paints that need to be pre-mixed and dropped into a paint sprayer are probably more durable, but I am not taking my motorcycle elk hunting so I think the finish will last. The Kandy from House of Kolor turned out real well straight from their rattle cans.
Here is the tank before I started. It is a tank from an 80's era GS550 Suzuki (so i was told by the junk yard). I just wanted to get rid of the tear drop style tank that came stock on the CB650 and this one gave me the cafe look I wanted. Since the CB650 was so short-lived in Honda's OHC line-up no one really makes any after market parts for it that bolt right on. This cafe project included quite a few custom mods and wasn't as easy as buying a CB750 like everyone else does. I knew what I was getting into but the power/weight ratio on the CB650 told me that the end result should be faster by comparison to the CB750.
 Stock Specs 1982 CB650
Weight including oil, gas, etc.: 476.2 lbs.
HP: 63HP @ 9000 rpm
7.56 lbs per HP
Stock Specs 1982 CB750
Weight including oil, gas, etc.: 564.4 lbs
HP: 77HP @ 9000 RPM
7.33 lbs per HP
As you can see the 750 has a slight advantage, but when you look at the two bikes side by side with an eye for what can be removed, it is clear that the 650 has more weight to lose than the 750 in extra framing for the passenger pegs, centerstand, etc. Now that I have removed about 24 lbs worth of extra 80's Honda silliness (4 lbs in rear tail light assembly!) the numbers grow substantially.
Let's say I removed the same from both bikes (which I don't think could happen):
CB750
564.4 - 24 = 540.4 lbs
540.4/77hp = 7.01 lbs per horse
CB650
476.2 - 24 = 452.2 lbs
452.2/63hp = 7.17
Now the power to weight ratio is just about equal. Now add some horsepower to your equation with intake, exhaust and rejetting modifications and the CB650 will come out on top in the end. But like I said, it's too bad hardly anyone makes after market parts to bolt right onto the CB650.
While I am talking about modifications for speed I feel that too many home project bikes get short-changed by missing the one modification that can make all the difference in the world: The clutch disks. What good is any of the horsepower, especially the aftermarket increases made, if the power isn't getting to the final drive chain efficiently enough to be taken advantage of? You must get yourself a high performance aftermarket clutch assembly to transfer this power to the wheel or else your bike just looks and sounds cool, but like I said, gets short-changed by short-sightedness. (There I will now step down off the podium... for a bit anyway.)
Back to the tank:
It had some emblem mounting brackets and few dents that I needed to smooth out. So after a good bead blasting at my buddies place I slathered on the bondo hoping I had enough in the right places to bring it down to level. I mixed too much hardener (the little tube) in ratio to the actual putty and my dry time decreased substantially from the supposed 15 minute working time that the instructions told me I had. It doesn't take much to catalyze a good body filler.

So after bondo and sanding with 220 grit on an orbital sander, I primed it and sanded the inconsistent areas again with the orbital and then sanded some more with a large piece of 220 wrapped over a scrap of hardwood 2x4 to bring everything to the same plane across the flat areas.

Then i primed it again and the result showed some minor inconsistencies... again. If you look closely at what appears to be a flat surface you can see an oval shadow that surrounds the area very lightly and another shadow right through the middle of that oval. These are the shadows that will destroy a good paint job in the end when the sun is hitting it. Get rid of them now. A good paint job is almost entirely in the prep.

Here is the aftermath of sanding that shows more clearly the areas that need more work.

Now here is the pro trick of this Prime/sand/prime step:
2 coats of primer in different colors
The raised spots shown on my tank above were so bad that sanding to "level" took it all the way back down to the bare metal. But in subsequent treatments of sanding, priming, sanding you will start to notice even the tiniest imperfections as you sand through the top primer color to the other primer color below.
*Some people might say that the level of detail work that I am talking about with the two coats of primer is overkill. But those people aren't allowed in my garage to drink my cheap beer.
***To help with wasting a bunch of primer though here is a trick I learned myself:***
After you sand and think you have a flat surface that is done and ready for the last coat of primer, wet the piece down with mineral spirits to clean it and then tilt it into a bright light and watch the reflection of that light on the surface. Look for the wavy distortion as the light does or does not reflect correctly around the curves or perfectly solid through the flat planes.


Plus after wiping it down I noticed a few more little spots that needed some help:

The above shots looked good but i was out of primer and still buzzing from aerosol cans so I decided to start mocking up the way I wanted the decals to look:


So the next day I had my lovely wife pick up some primer. Give your primer-runner the empty can so that you are sure to get the right stuff delivered. Primers might mix well and adhere to one another but it's not worth the risk.
And there we have it... Filled and primed like a professional... well the end result is but I bet the process is more efficient when done by a pro.


Part 2 The Paint: Applied Graphics Decals, Striping, Shimrins Base Coats, Metallic Paint and Clear Coat - all rattle cans by House of Kolor!
Most metallic paints require a specific undercoat which is basically a primer that is designed to reflect light back through the metallic paint correctly. I am going to use three different colored top coats white, black, and red in metallics. The black and white both use a white base coat so I planned my paint coats accordingly.
I have done the white base coat and then sprayed the metallic white top coat where I had mapped out the checkered decals. The decals are made by Applied Graphics and sold through reflectivedecals.com. They are retro-reflective which is a safety bonus since they are designed to shine the light back into the source. If you had headlights on and were sitting behind the wheel my checkers will light up in the night for you... cool. After applying the white top coat, and then decals, I taped off the areas I wanted to keep white in preparation for the black top coats.

Pulling the tape off of the black was sorta nerve racking. This was going to be the biggest part of whether my plan was going to work or not. Sidecovers... so far so good.

The whole tank looks pretty great...

... Except for one or two areas where I didn't push the tape down hard enough and I got some underspray. I used my fingernail on every raised edge of every decal and thought that I pushed down hard enough everywhere else but as you can see in the small bends it let a little black paint through.

Luckily the gas cap covers the worst areas. maybe I can tweak my red stripes to cover it up as well.


After black and white top coats were applied I sprayed on two coats of clear just in case I messed up the red striping and had to start sanding somewhere. Now in preparation for red and its base coat of silver, I taped everything off in a design that was painstakingly delicate. This time I pressed every miniscule piece of tape fragment down with the edges of my fingernails before I sprayed.


After carefully cutting the tape the way I wanted and pressing everything down I warmed up the tank by rigging my Wagner heat gun (which is good for only warming up your hands not stripping varnish or anything... but I picked it up for 2 bucks at a garage sale). It is pretty cold in my Oregon garage at night in February so I figured the paint would be happier if applied to a surface that wasn't "room temp". I also kept all my paint in the laundry room until I was ready to use it.

Hey Man, Silver would probably look good. Maybe I should stop here...

The silver base coat was VERY metallic. As I was spraying I could watch little flakes sputter out around the surface and glisten in my shop light. It was kinda romantic.

Well I went for the red top coat about 5 minutes after applying the silver and taking some pics with my camera phone. If you let the two layers dry together I think it helps them bond. (I forget which site I read that on, but it seems true).

After about 20 mins of drying I pulled the red tape job...

At first I was kinda disappointed. I couldn't tell what it was exactly. It could have been a number of things that were killing my perfectionist attitude and depressing the excitement over all the painstaking work I had done:
1) places where I had cut the tape actually showed black paint chipped off by the razor blade. That was a bummer.
2) there was still a bit of underspray or blow-under or whatever the tech-talk is for this. So now I had a bit of red on some of the white checker edge areas. You gotta click on this picture to see them on the right side of the right checker about in the middle of the tank.... still it totally bugs me.
3) The red looks kinda queer to me. Shoot. Maybe too much red, maybe too busy with all the striping. Crap. I don't know maybe it isn't too bad...

A few more minutes of carefully razoring edges of paint that wasn't quite right and small clean-ups here and there in small detail... maybe the red will look better under the clear coat.


After the above shots were taken I took a black and a red sharpie to the very small, 3-dimensional edges of the paint layers as well as where I had cut into the black with my razor blades. Now I know why a good pin-striper uses a special brush and pulls perfect lines without taping. Oh well all in all I think it worked pretty well and am pleased with the tank now that I cleaned up all the tiny areas that would have bugged me every time I got on the bike.
It is ready for the clear coat.
I really couldn't find a concise, informative site that walked a guy through all the steps of repairing a motorcycle tank all the way from bondo to clear coat. So here is a process that seems to have worked for me. It has steps that were gleaned from multiple sites as well as a few friends and some buddies at Baxter Auto parts where I bought my House of Kolor rattle cans.
That's right, Rattle CANS! Sure, the catalyzed 2-part automotive paints that need to be pre-mixed and dropped into a paint sprayer are probably more durable, but I am not taking my motorcycle elk hunting so I think the finish will last. The Kandy from House of Kolor turned out real well straight from their rattle cans.
Here is the tank before I started. It is a tank from an 80's era GS550 Suzuki (so i was told by the junk yard). I just wanted to get rid of the tear drop style tank that came stock on the CB650 and this one gave me the cafe look I wanted. Since the CB650 was so short-lived in Honda's OHC line-up no one really makes any after market parts for it that bolt right on. This cafe project included quite a few custom mods and wasn't as easy as buying a CB750 like everyone else does. I knew what I was getting into but the power/weight ratio on the CB650 told me that the end result should be faster by comparison to the CB750.
 Stock Specs 1982 CB650
 Weight including oil, gas, etc.: 476.2 lbs.
HP: 63HP @ 9000 rpm
7.56 lbs per HP
Stock Specs 1982 CB750
Weight including oil, gas, etc.: 564.4 lbs
HP: 77HP @ 9000 RPM
7.33 lbs per HP
As you can see the 750 has a slight advantage, but when you look at the two bikes side by side with an eye for what can be removed, it is clear that the 650 has more weight to lose than the 750 in extra framing for the passenger pegs, centerstand, etc. Now that I have removed about 24 lbs worth of extra 80's Honda silliness (4 lbs in rear tail light assembly!) the numbers grow substantially.
Let's say I removed the same from both bikes (which I don't think could happen):
CB750
564.4 - 24 = 540.4 lbs
540.4/77hp = 7.01 lbs per horse
CB650
476.2 - 24 = 452.2 lbs
452.2/63hp = 7.17
Now the power to weight ratio is just about equal. Now add some horsepower to your equation with intake, exhaust and rejetting modifications and the CB650 will come out on top in the end. But like I said, it's too bad hardly anyone makes after market parts to bolt right onto the CB650.
While I am talking about modifications for speed I feel that too many home project bikes get short-changed by missing the one modification that can make all the difference in the world: The clutch disks. What good is any of the horsepower, especially the aftermarket increases made, if the power isn't getting to the final drive chain efficiently enough to be taken advantage of? You must get yourself a high performance aftermarket clutch assembly to transfer this power to the wheel or else your bike just looks and sounds cool, but like I said, gets short-changed by short-sightedness. (There I will now step down off the podium... for a bit anyway.)
Back to the tank:
It had some emblem mounting brackets and few dents that I needed to smooth out. So after a good bead blasting at my buddies place I slathered on the bondo hoping I had enough in the right places to bring it down to level. I mixed too much hardener (the little tube) in ratio to the actual putty and my dry time decreased substantially from the supposed 15 minute working time that the instructions told me I had. It doesn't take much to catalyze a good body filler.

So after bondo and sanding with 220 grit on an orbital sander, I primed it and sanded the inconsistent areas again with the orbital and then sanded some more with a large piece of 220 wrapped over a scrap of hardwood 2x4 to bring everything to the same plane across the flat areas.


Then i primed it again and the result showed some minor inconsistencies... again. If you look closely at what appears to be a flat surface you can see an oval shadow that surrounds the area very lightly and another shadow right through the middle of that oval. These are the shadows that will destroy a good paint job in the end when the sun is hitting it. Get rid of them now. A good paint job is almost entirely in the prep.

Here is the aftermath of sanding that shows more clearly the areas that need more work.

Now here is the pro trick of this Prime/sand/prime step:
2 coats of primer in different colors
The raised spots shown on my tank above were so bad that sanding to "level" took it all the way back down to the bare metal. But in subsequent treatments of sanding, priming, sanding you will start to notice even the tiniest imperfections as you sand through the top primer color to the other primer color below.
*Some people might say that the level of detail work that I am talking about with the two coats of primer is overkill. But those people aren't allowed in my garage to drink my cheap beer.
***To help with wasting a bunch of primer though here is a trick I learned myself:***
After you sand and think you have a flat surface that is done and ready for the last coat of primer, wet the piece down with mineral spirits to clean it and then tilt it into a bright light and watch the reflection of that light on the surface. Look for the wavy distortion as the light does or does not reflect correctly around the curves or perfectly solid through the flat planes.


Plus after wiping it down I noticed a few more little spots that needed some help:

The above shots looked good but i was out of primer and still buzzing from aerosol cans so I decided to start mocking up the way I wanted the decals to look:


So the next day I had my lovely wife pick up some primer. Give your primer-runner the empty can so that you are sure to get the right stuff delivered. Primers might mix well and adhere to one another but it's not worth the risk.
And there we have it... Filled and primed like a professional... well the end result is but I bet the process is more efficient when done by a pro.


Part 2 The Paint: Applied Graphics Decals, Striping, Shimrins Base Coats, Metallic Paint and Clear Coat - all rattle cans by House of Kolor!
Most metallic paints require a specific undercoat which is basically a primer that is designed to reflect light back through the metallic paint correctly. I am going to use three different colored top coats white, black, and red in metallics. The black and white both use a white base coat so I planned my paint coats accordingly.
I have done the white base coat and then sprayed the metallic white top coat where I had mapped out the checkered decals. The decals are made by Applied Graphics and sold through reflectivedecals.com. They are retro-reflective which is a safety bonus since they are designed to shine the light back into the source. If you had headlights on and were sitting behind the wheel my checkers will light up in the night for you... cool. After applying the white top coat, and then decals, I taped off the areas I wanted to keep white in preparation for the black top coats.

Pulling the tape off of the black was sorta nerve racking. This was going to be the biggest part of whether my plan was going to work or not. Sidecovers... so far so good.

The whole tank looks pretty great...

... Except for one or two areas where I didn't push the tape down hard enough and I got some underspray. I used my fingernail on every raised edge of every decal and thought that I pushed down hard enough everywhere else but as you can see in the small bends it let a little black paint through.

Luckily the gas cap covers the worst areas. maybe I can tweak my red stripes to cover it up as well.


After black and white top coats were applied I sprayed on two coats of clear just in case I messed up the red striping and had to start sanding somewhere. Now in preparation for red and its base coat of silver, I taped everything off in a design that was painstakingly delicate. This time I pressed every miniscule piece of tape fragment down with the edges of my fingernails before I sprayed.


After carefully cutting the tape the way I wanted and pressing everything down I warmed up the tank by rigging my Wagner heat gun (which is good for only warming up your hands not stripping varnish or anything... but I picked it up for 2 bucks at a garage sale). It is pretty cold in my Oregon garage at night in February so I figured the paint would be happier if applied to a surface that wasn't "room temp". I also kept all my paint in the laundry room until I was ready to use it.

Hey Man, Silver would probably look good. Maybe I should stop here...

The silver base coat was VERY metallic. As I was spraying I could watch little flakes sputter out around the surface and glisten in my shop light. It was kinda romantic.

Well I went for the red top coat about 5 minutes after applying the silver and taking some pics with my camera phone. If you let the two layers dry together I think it helps them bond. (I forget which site I read that on, but it seems true).

After about 20 mins of drying I pulled the red tape job...

At first I was kinda disappointed. I couldn't tell what it was exactly. It could have been a number of things that were killing my perfectionist attitude and depressing the excitement over all the painstaking work I had done:
1) places where I had cut the tape actually showed black paint chipped off by the razor blade. That was a bummer.
2) there was still a bit of underspray or blow-under or whatever the tech-talk is for this. So now I had a bit of red on some of the white checker edge areas. You gotta click on this picture to see them on the right side of the right checker about in the middle of the tank.... still it totally bugs me.
3) The red looks kinda queer to me. Shoot. Maybe too much red, maybe too busy with all the striping. Crap. I don't know maybe it isn't too bad...

A few more minutes of carefully razoring edges of paint that wasn't quite right and small clean-ups here and there in small detail... maybe the red will look better under the clear coat.


After the above shots were taken I took a black and a red sharpie to the very small, 3-dimensional edges of the paint layers as well as where I had cut into the black with my razor blades. Now I know why a good pin-striper uses a special brush and pulls perfect lines without taping. Oh well all in all I think it worked pretty well and am pleased with the tank now that I cleaned up all the tiny areas that would have bugged me every time I got on the bike.
It is ready for the clear coat.
Subscribe to:
Posts (Atom)